The structure of an electric water heater is pretty simple. And when it comes to thermostats, the device uses two of them generally. One should be sitting on the top of unit 1. While the other is found right on the bottom.
Both thermostats control two different heating elements for the heater to function. Now sometimes, you use the hot water tap to only discover cold water coming out. This is when the upper thermostat has a problem. And if the opposite happens, it supposedly means that the bottom one is damaged.
However, that conclusion can’t yet be clear this way. You have to go through a proper thermostat testing session to be completely sure. And that’s when my tutorial on how to test water heater thermostat will need your attention.
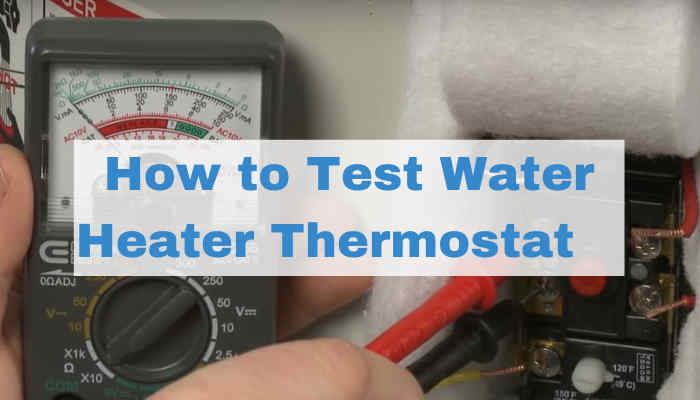
Table of Contents
How to Test Water Heater Thermostat Using Simple Tools Available at Home.
Okay so, the process of testing thermostat isn’t really very complicating. You can use the tutorial for almost any type of water heater out there. I’m guessing you already know how the thermostat works as that idea will surely help in this process. You are going to use an analog or digital multimeter for this testing.
Also, let me warm you working with electricity is quite dangerous. And so, you should always prioritize safety considerations and precautions to not end up getting a shock or any sort of personal injuries. If you are not sure about doing this yourself, just give up and call a professional.
On That Note, Let’s Jump into The Tutorial…
The Tools You’ll Need!
- A flathead screwdriver (or a quarter-inch nut driver)
- Phillips screwdriver.
- Multimeter or voltmeter.
Start Safe by Turning the Power off.
Get to your circuit board wherever it is in your house. You need to turn off the breaker meant for water heater. You should find it inside the panel box. There should be a label called hot water or a simply water heater. Just turn off after finding it.
Detach the Covers.
Now bring the nut driver or flathead screwdriver whichever you have. Use this to get the thermostat’s access panel. You want to remove both panels of the upper and lower thermostats.
Next, you need to fold back the insulation right over thermostat. Get some tape and let insulation stay out of the way. The thermostat should have an interior plastic cover. Time to get that out as well.
High Limit Reset Button Check.
Now use multimeter to check that the power is really off from water heater. You can also try a voltage stick instead of it is available. You need to touch tops to legs using the connections of a multimeter. If the reading shows zero, then it’s safe to proceed. Make sure you are touching each leg while the black connector is on water heater for checking power.
Now move ahead to observe the high limit reset button. It could be tripped for several reasons. If the thermostat’s contacts are fused to close then this can happen. Also, sometimes the thermostat being out of calibration results in tripping. Sometimes when heating element is damaged the incident happens too.
Wire Disconnection.
Get some photos of the existing wiring to have a reference for later reconnection. This will make the identifying process of which wire connects where easier for you during finishing phase. Get a Philip screwdriver to disconnect the wire from thermostat’s terminals. Usually, a #2 Philips screwdriver is best to use here.
Use the Multimeter.
If you are using an analog multimeter then set it to the lowest ohms of resistance. This is usually x10 in the most analog multimeter. You need to pinch probes together while adjusting the needle to zero for meter calibration.
If you are using a digital multimeter here then also setting the lowest ohms for resistance is your first duty. Usually, it is on 200 in the digital multimeter. There can be resistance with tone options as well that you can use.
On left side screw terminal, bring one of the black probes of your multimeter. The red probe will similarly stick with other left-side terminals. The meter should be showing zero if terminal has continuity. And if that is not the case, your water heater’s thermostat is damaged. And it needs replacement.
Use the same formula to repeat this for right-side terminals. Also, follow up with the element terminals. If you figure out that thermostat located above is just fine, then move on to the one existing on bottom.
Repeat exact same process for the bottom thermostat. As soon as you are done checking, finish everything up by reconnecting those wires. If you want to replace the thermostat meanwhile, then do that first before putting everything back to its place. Close the access panels.
In case both your thermostat is doing fine, then maybe the problem relates to heating elements. You should check that as well.
Final thoughts
And that’s all you need to know! Dealing with water heaters isn’t the most challenging stuff. Even if you end up for a replacement need of thermostat, don’t get intimidated. Because that needs not more than a few minutes honestly.
Just make sure you don’t fall into traps of following shortcuts. In the realm of electricity, a shortcut often means getting shocked. Sometimes people die of their careless attempts. I never want you to follow those trails.
So be a little wise, learn the right techniques, get those proper tools, and only when you are absolutely sure of trying this, go ahead.
I hope my tutorial on how to test water heater thermostat will come in use and you’ll be able to figure out the problem without any trouble. I will see you soon on the next interesting topic. Until Then, Take Care & Keep Exploring for Learning!